User Guide
Welcome to the User Guide. This guide provides step-by-step instructions to help you navigate and maximize the features of our software. From installation to advanced use cases, this software user guide is designed to help both new and experienced users get the most out of their experience.
Getting Started with the User Guide
This User Guide begins with a basic overview of installation, setup, and the initial steps needed to start using the software. Follow these simple instructions to get up and running quickly. The getting started section is perfect for first-time users who want an easy introduction to the software’s core functionalities.
Table of Contents
Last Updated 11/16/24
1.1 MULTIPROMPTER OVERVIEW
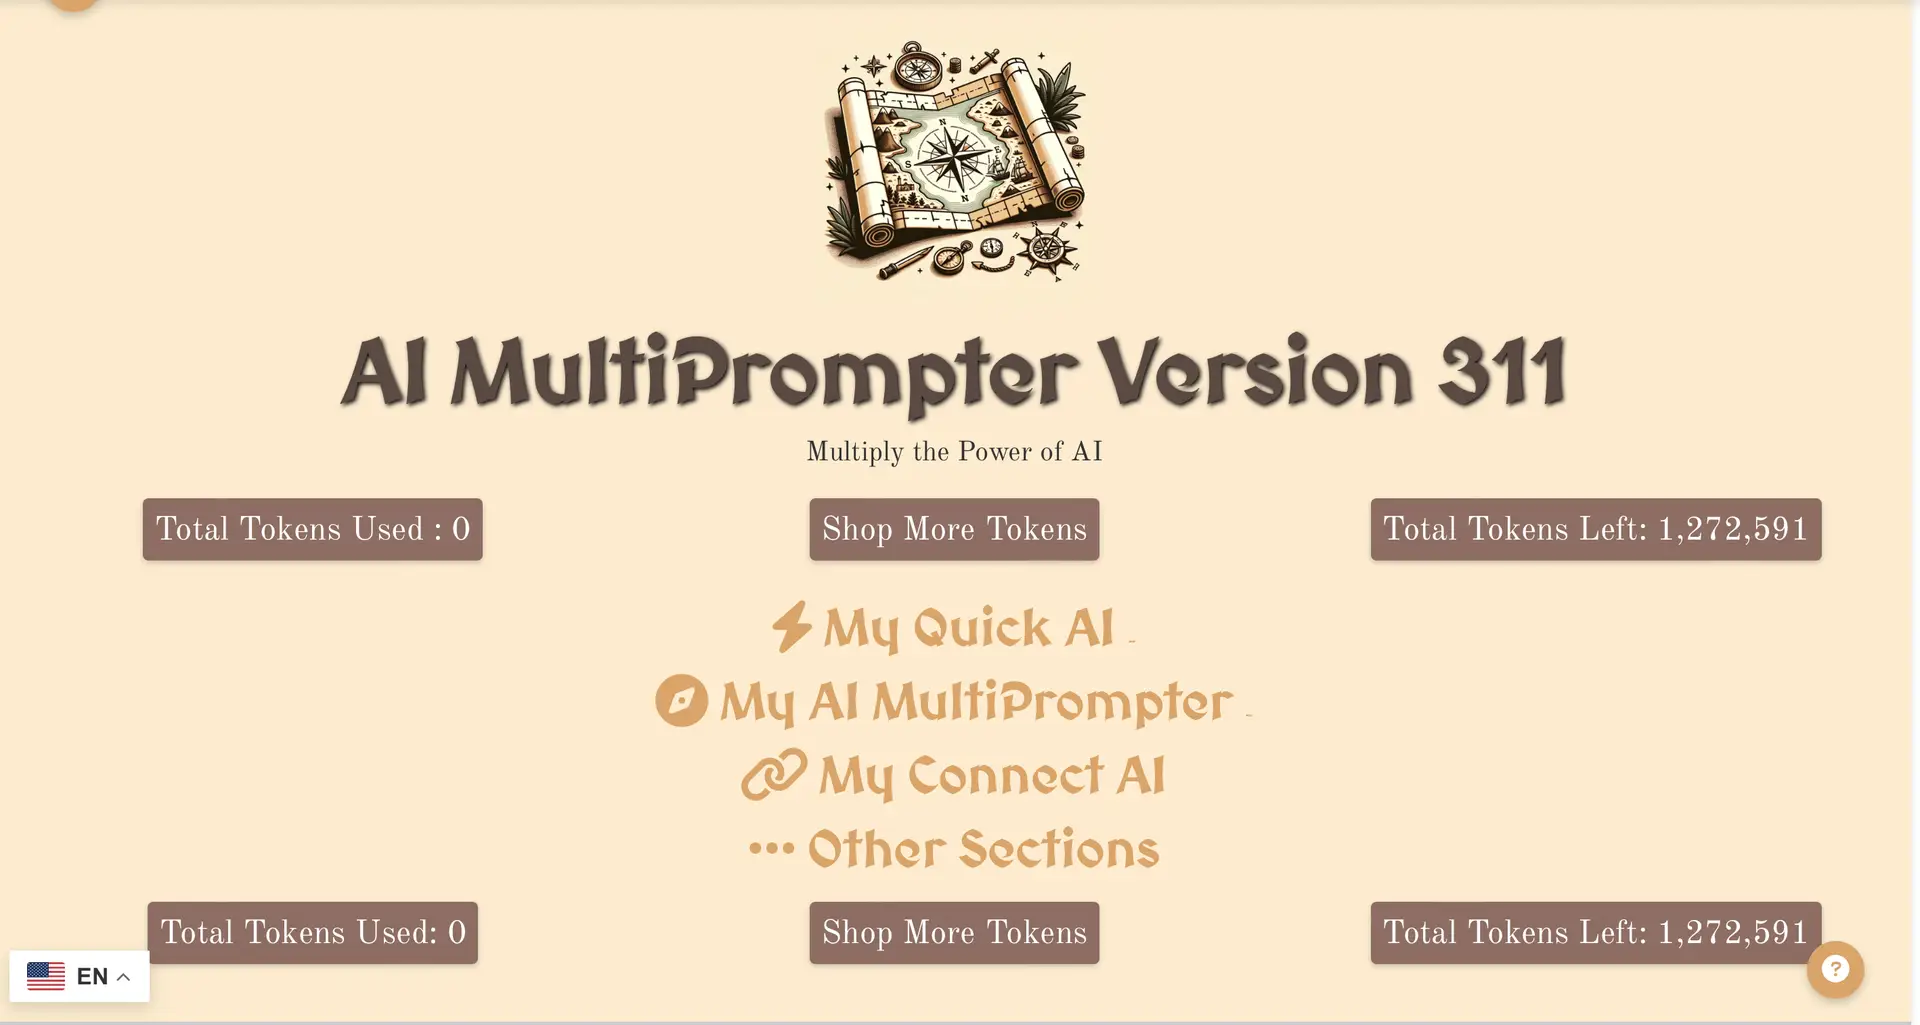
AI MultiPrompter has 4 main tabs: My Quick AI, My AI MultiPrompter, My Connect AI, & Other Sections.
My Quick AI is used to access all 20+ AI models from one interface in an AI conversation box, enabling it to serve as a multimodal AI Audio/Image/Text generation hub.
My AI MultiPrompter provides access to keyword-specific prompting modes, such as My Custom Prompts, My Article Prompts, My Image Prompts, My Audio Prompts, and My SERP Prompts. Use the My Inputs section to add keywords used in keyword replacement across various prompting modes. If you have advanced search, you can also use Claude, Chat-GPT, or Gemini models connected to Google Search Results and *Live Web Data or uploaded Images.
*Note: Live Web Data is a premium feature available in the Internet Basic and Internet Premium MultiPrompter subscription tiers.
My Connect AI provides access to sequential processing of ai models. Create custom step combinations which allow for multimodal data processing. If you have advanced search, you can also use Claude, Chat-GPT, or Gemini models connected to Google Search Results and *Live Web Data or uploaded Images.
Other Sections provides subtabs to the Zapier settings, additional settings and options including automation variables, live fetching customization settings, and more, the Custom Chat-GPT Model Marketplace (coming soon), and additional AI MultiPrompter apps such as the Youtube Scraper and File Converter.
At the top and bottom of the main app page, you’ll find details about your total tokens used, a link to buy more tokens, and your remaining token balance. These elements display the user's token usage per session, provide a quick link to purchase additional tokens, and show the user's current account balance.
2.1 MY QUICK AI
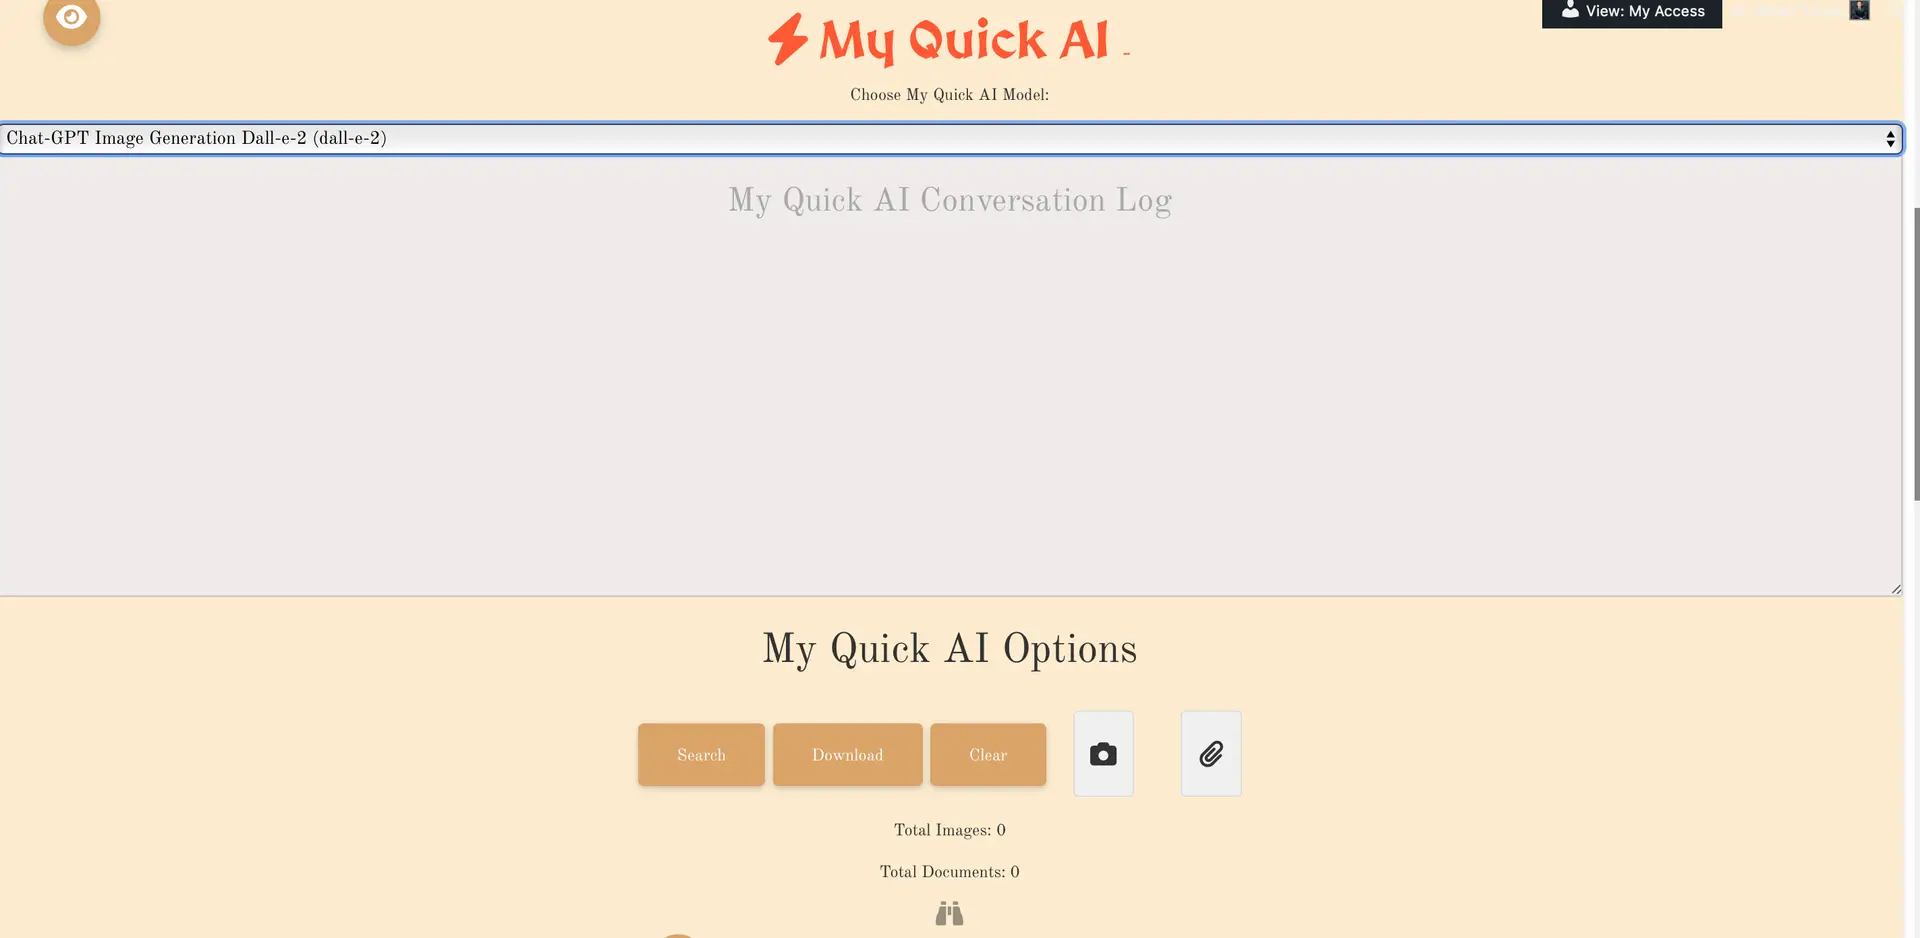
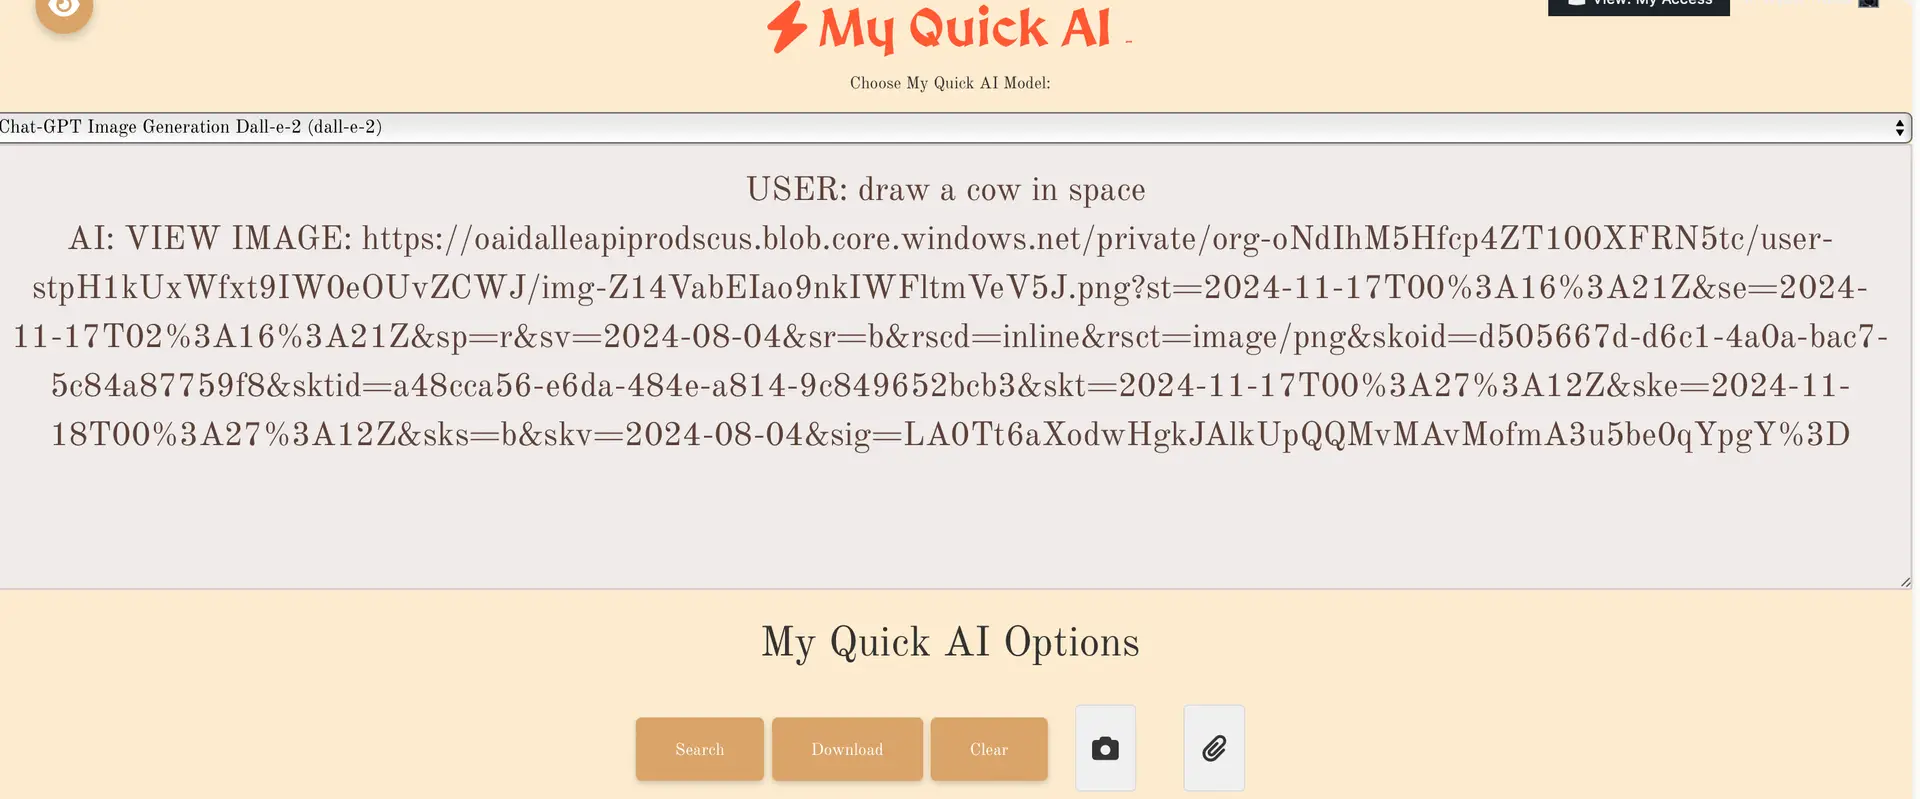
My Quick AI is used to access all 20+ AI models easily in an intuitive chatbox.
Press Search after adding text to the conversation log, images, or files, and after selecting your prefered AI model from the above dropdown. Press the binoculur icon to start a live web search, which connects your selected ai model to a google search fetching process that retrieves top results information from your inputs.
*Note: Live Web Data is a premium feature available in the Internet Basic and Internet Premium MultiPrompter subscription tiers.
Use clear to remove the conversation history, download the conversation with the download button, including all links to images or audio generated in the conversation.

3.1 MY INPUTS
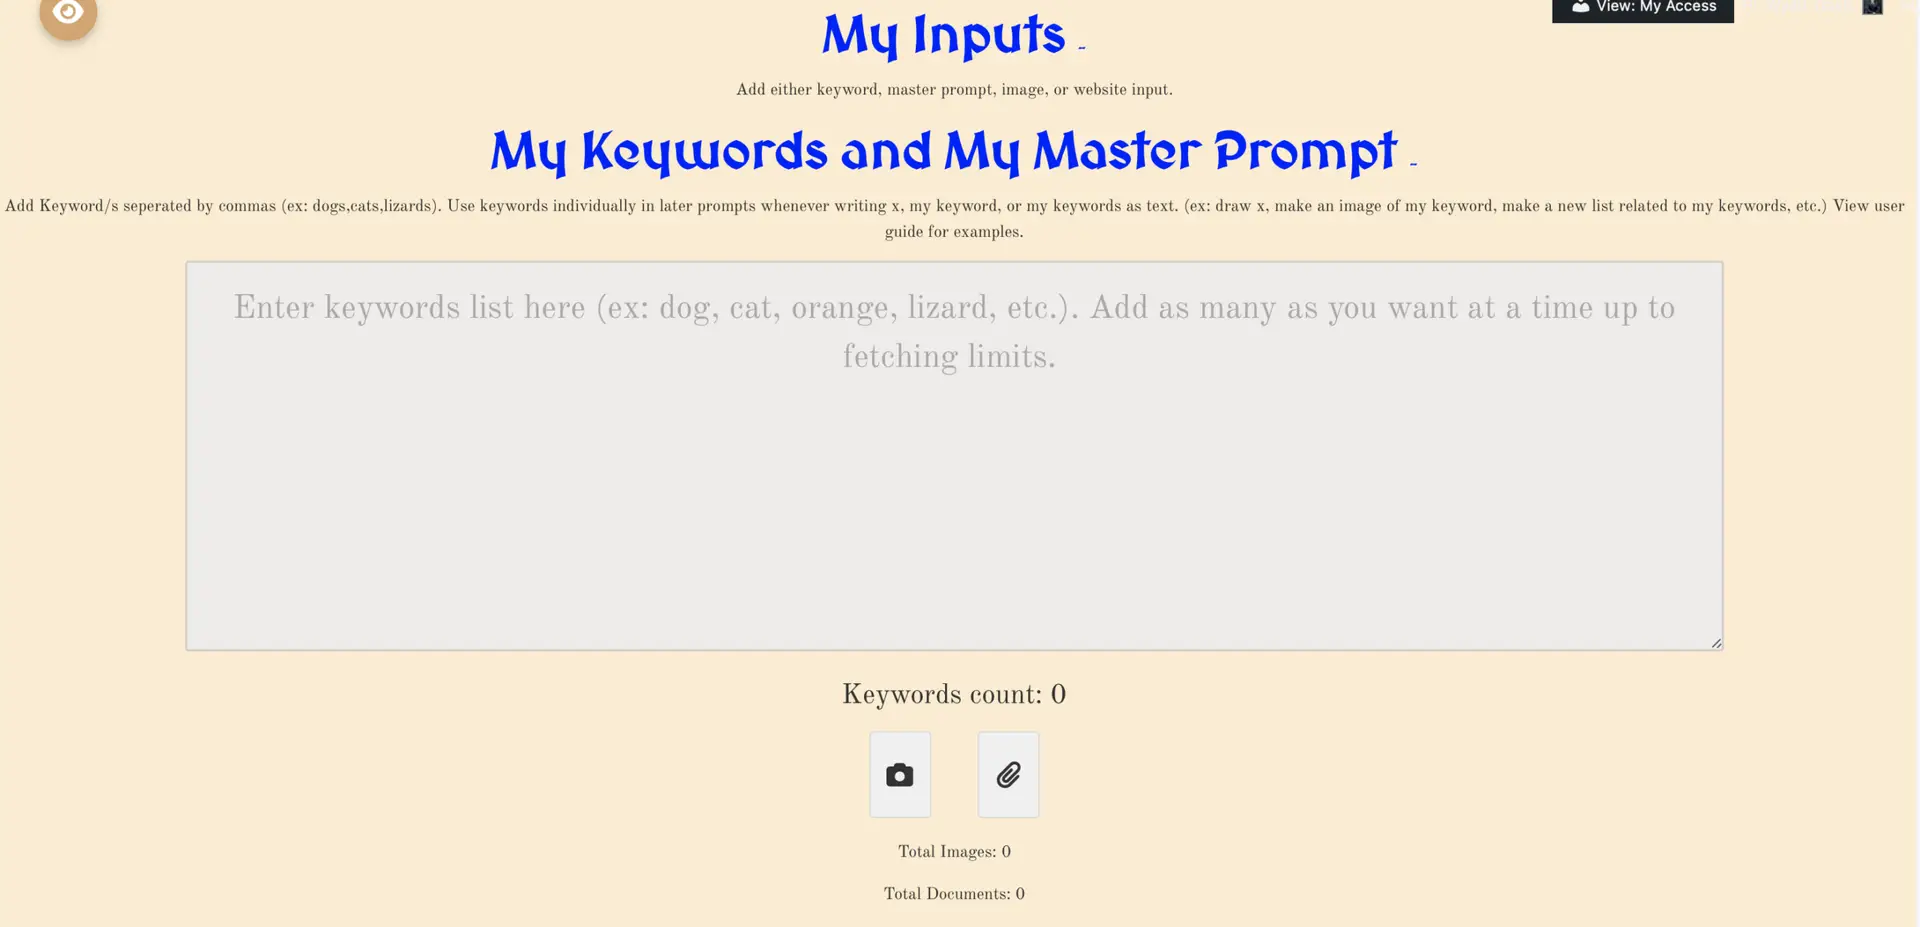
This section Allows you to add Inputs which can be Interpreted by keyword-specific prompting modes. Here you add keyword data, master prompt data, image data, or website link data that is universally linked to your keyword prompts.
3.2 MY KEYWORDS AND MY MASTER PROMPT
My Keywords
Enter keywords into the textbox to enable keyword searches. Note: You can bypass this by adding no keywords at all. If you add keywords, these can be used in later prompts by referencing them with the keyword replacement guide logic. Note shortcuts My keywords, my keyword are used in a prompt to replace with each of your designated keywords.
For example, if you have a text-to-text prompt using Chat-GPT 4 as the AI model, and the prompt reads: “Write an article about my keywords,” and your keywords are "dogs, cats," MultiPrompter will write 2 articles, one about dogs and one about cats.
A keyword could be a lengthy equation, an entire section of code, a set of instructions, a poem, a story, etc. Keywords are not limited to single words. You can add as many keywords as you like, but be aware that this will multiply the amount of tokens used in any search. It is highly recommended to perform a test search without keywords first to ensure your prompt settings produce the expected output.
Use commas to separate different keywords. For example, "apples, oranges" will be treated as two keywords. Be cautious when using numbers or pasting keywords containing commas, as these will break up the keywords into separate entries.
Each prompt generates a unique response for each keyword. For example, if you create three DALL-E 3 images using custom prompts or image prompts, and each image costs 2,000 tokens:
- One keyword will result in three images (est cost: 6,000 tokens).
- Two keywords will result in six images (est cost: 12,000 tokens).
It is recommended to use only one keyword or fewer when generating image outputs, as exceeding fetch restrictions may lead to incomplete searches (a fix will be included in future updates).
My Master Prompt
Use the My Master Prompt section to create a comprehensive and reusable prompt template appended to all prompts. This can include multiple custom instructions, examples, or preset options. The Master Prompt helps streamline complex tasks and ensures consistency in repeated AI outputs.
Add your keywords or instructions directly into the template and test it to verify the output meets your requirements before using it extensively. Keep in mind that the complexity of the Master Prompt will also affect token usage and overall costs.
My Master Prompt
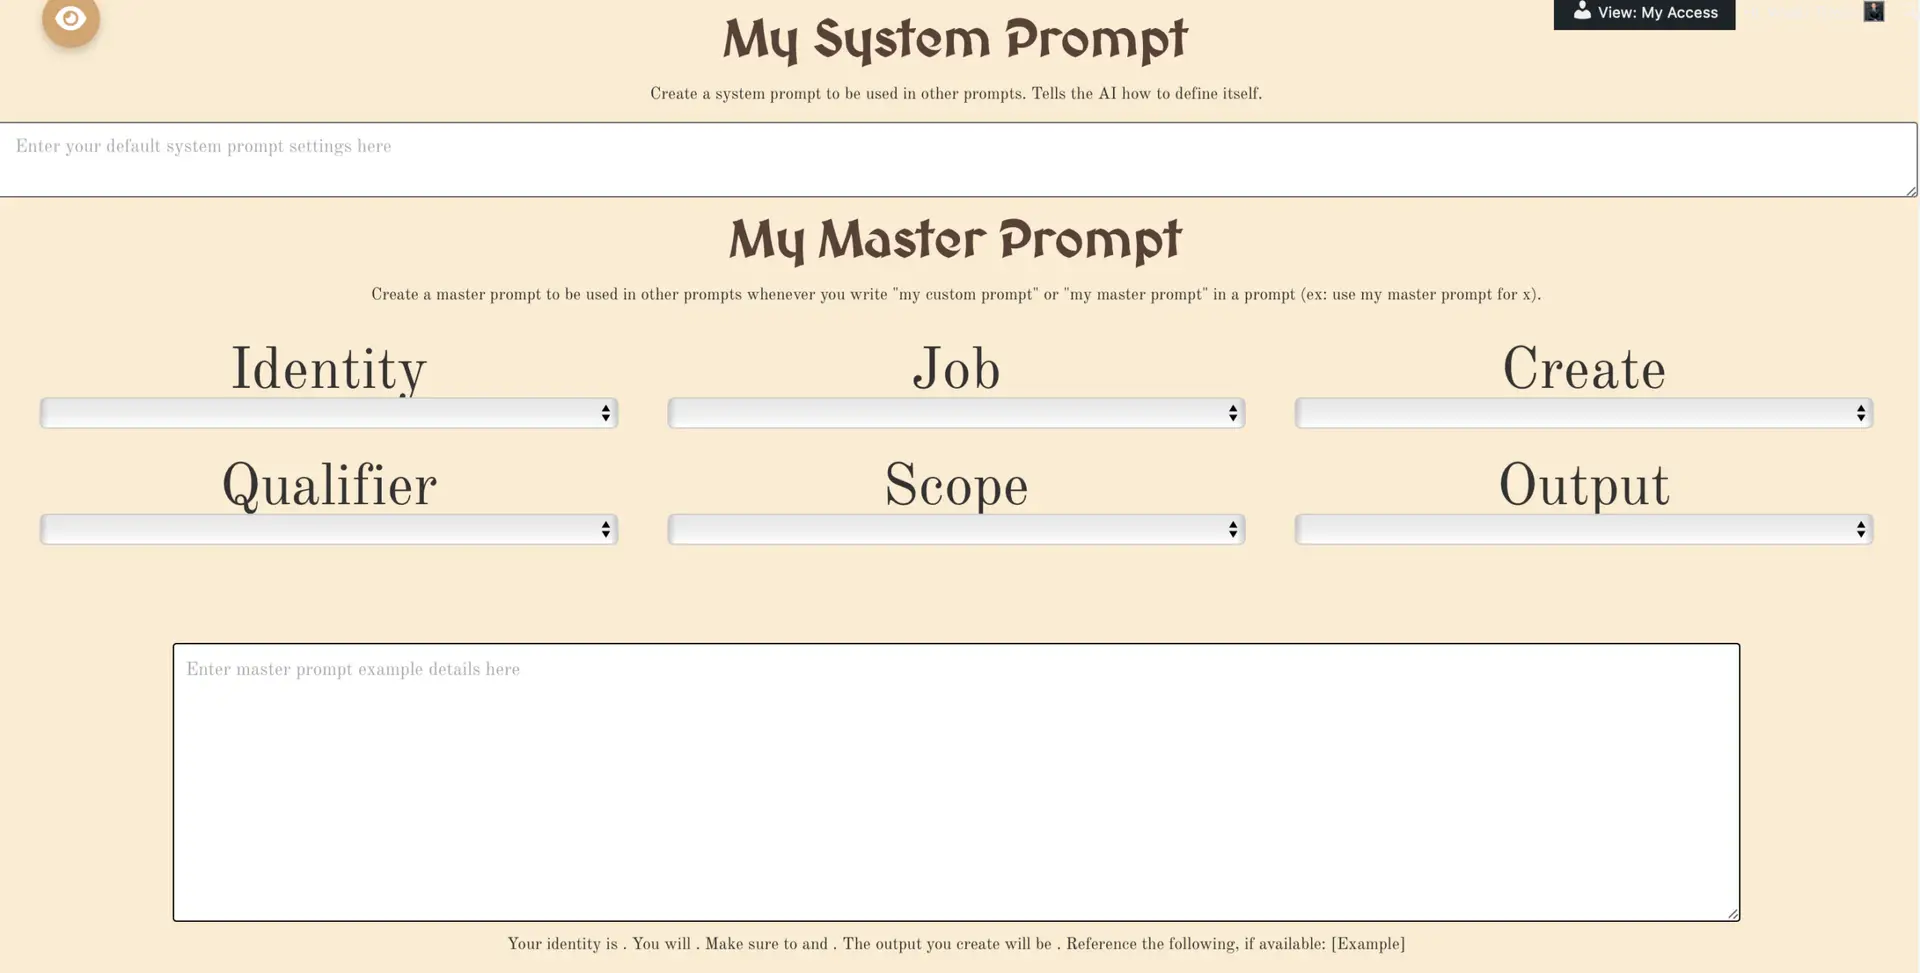
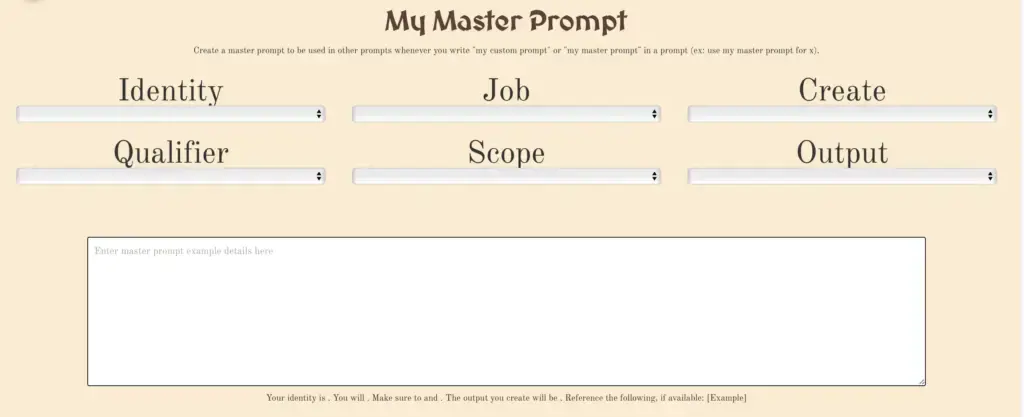
My Master prompt is a unique section where a user can create a master prompt using either preset or user-customized directions and call on this in later prompts. you have six submenus with preset options including identity, job, create, qualifier, scope, and output. use custom to write your own preset instructions if you can't find one you like from our dropdowns.
In the example section add a example of what kind of output you want if desired or examples of code or writing or further instructions.
Reference your customized master prompt by writing my master prompt or my custom prompt into a prompt direction. for example, if i am using my Custom 1 prompt to "make an image using my custom prompt" it will add my custom prompt directions as a shorthand into the instructions. my master prompt is useful if you have several MultiPrompts with similar or the same directions.
Use the My System Prompt section to create directions for the Chat-GPT models to specify a system identity. This helps the AI to define its role.
Add your keywords or instructions directly into the template and test it to verify the output meets your requirements before using it extensively. Keep in mind that the complexity of the Master Prompt will also affect token usage and overall costs.
3.3 MY IMAGES
Upload images which can be referenced in prompts when writing my images or my image. for example, you can take a picture of your Refrigerator and ask in our 4 image to text prompts or 9 custom prompts, "what should i eat for dinner" and it will generate a list of ideas based on your upload. do similar functions for any other images on your devices by clicking on add image under my image.
note that multiple images can only be interpreted by chat-gPT and not Google Gemini.
Note also that in order to add new images, you must currently refresh the screen.

3.4 MY EXTERNAL REFERENCES
My External References
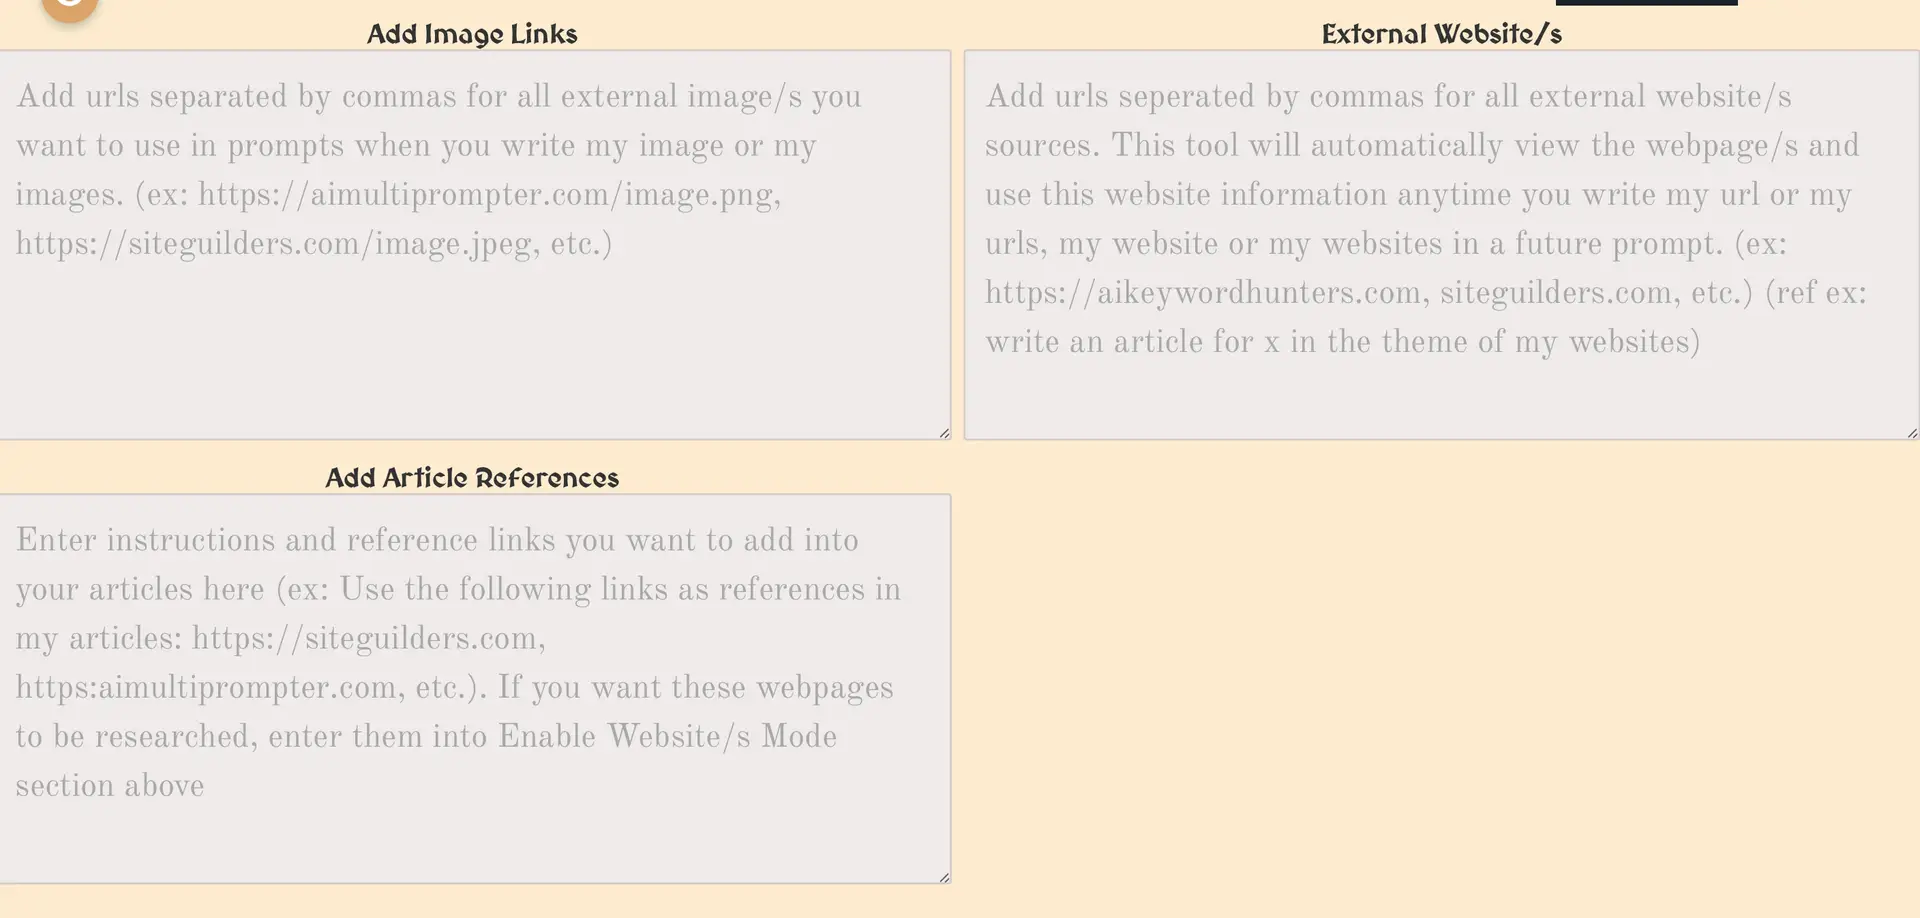
The My External References section allows you to integrate external data sources into your AI prompts seamlessly. This feature supports three key areas: image links, website URLs, and article references.
Add Image Links
Enter URLs separated by commas for all external images you wish to use in your prompts. These images can be referenced in any AI prompt by using phrases such as "write my image" or "my images."
For example: https://aimultiprompter.com/image.png, https://siteguilders.com/image.jpeg.
External Website/s
Enter URLs separated by commas for any external websites or sources you want the AI to reference. This tool will automatically analyze the specified webpages and include their information in your prompts when you reference "my URL" or "my website."
For example: https://aikeywordhunters.com, https://siteguilders.com.
Reference example: "Write an article for X in the theme of my websites."
Add Article References
Input instructions and reference links you wish to incorporate into your articles. These links will be used as contextual references in your writing prompts.
For example: Use the following links as references in my articles: https://siteguilders.com, https://aimultiprompter.com.
If you want these webpages to be actively researched and analyzed, ensure they are included in the "Enable Website/s Mode" section above.
Important Notes:
- Separate multiple entries with commas to ensure proper parsing.
- Ensure URLs are correct and accessible; invalid or broken links may result in incomplete references.
- Using multiple external references may increase processing time and token usage, so test outputs to optimize efficiency.
This section ensures your AI prompts are enriched with external context, allowing for more targeted and informed outputs.
4.1 MY PROMPTS
My Prompts
The My Prompts section allows you to create and manage keyword-speciic or keyword non-speciic (depending on whether you added any keyword input) prompts for generating tailored AI outputs. This feature supports five key prompting modes: custom AI prompts, article prompts, image prompts, SERP prompts, and audio prompts.
My Custom AI Prompts
Create fully customized prompts for generating any type of AI output (text, audio, images). These prompts are highly flexible and can be used for tasks such as creative writing, generating technical documentation, or exploring unique ideas.
For example: “Write a poem about the beauty of autumn using vivid imagery.”
My Article Prompts
Design prompts specifically for generating written content such as blog posts, essays, tutorials, or guides. You can use this section to structure prompts that include keywords for SEO optimization or focus on specific topics. Use one of the four custom article modes, including the link and combo modes which combine three articles together or write a fours article using three prior articles. Generate just one article up to four articles per keyword.
For example: “Write a detailed guide on how to set up a WordPress website.”
My Image Prompts
Craft prompts for creating visual content using AI models like DALL-E-2, and DALL-E-3. Specify styles, themes, and resolutions to generate unique images tailored to your needs. Set and control image size, image file type, image quality and more.
For example: “Generate a futuristic cityscape at sunset in a cyberpunk style.”
My SERP Prompts
Use this section to create prompts that incorporate search engine result pages (SERPs) data for real-time research and keyword information collection. Pair with programs like SEMRush to optimize keyword knowledge. This is especially useful for writing articles, gathering insights, or exploring trends. Note SERP keyword replacement is specific only to SERP prompts, but allows for extraction of keyword specific Google Search result info into prompts.
For example: “Summarize the top 5 articles on AI advancements from Google Search Results.”
My Audio Prompts
Generate audio content such as voiceovers, sound effects, or music. Customize your prompts to specify tone, language, style, or other parameters to achieve the desired output. Select from 6 audio voice options, and 4 audio output file types.
For example: “Create a motivational speech in a calm and inspiring voice.”
Important Notes:
- Choose the appropriate prompt type for your task to maximize efficiency and relevance.
- Test your prompts with minimal inputs to ensure the output aligns with your expectations.
- Using multiple complex prompts or keywords may increase token usage, so plan your prompts accordingly.
This section provides a centralized interface for managing all your AI-generated outputs, ensuring consistency, flexibility, and efficiency across various tasks and projects. The output section is also located here where you can downlaod all My MultiPrompter data.
4.2 MY CUSTOM AI PROMPTS
The My Custom AI Prompts section allows you to use any of the 9 available custom AI prompts to perform either quick searches or regular searches. These prompts can generate images, text, audio, or a combination of outputs depending on your needs. Each prompt can also leverage keyword replacement and file input features to further enhance output quality and relevance.
Add Image
You can add a single image to your custom prompt, which can be interpreted for image-to-text responses using Google Gemini Vision. Note that:
- Only 8 quick searches are enabled on mobile devices.
- Google Gemini Pro and Gemini Pro Vision are only supported on the desktop version of MultiPrompter and do not work on mobile. Other Google AI models are available on mobile.
Keyword Replacement
Each custom prompt allows you to incorporate keyword replacement dynamically. Use keywords to generate multiple versions of a response based on the input keyword set. For example:
- Prompt: "Write an article about [X]." Keywords: "AI, technology, future."
- Output: Separate articles about AI, technology, and the future.
Add File Input
In addition to image inputs, each custom prompt includes a file input option to upload relevant documents or data. Files can be processed and referenced in the response, depending on the nature of the prompt. Supported file types include:
- Text files (e.g., .txt, .docx)
- Data files (e.g., .csv, .json)
- Code files (e.g., .py, .js, .html)
- Upload a text file containing notes, and ask the AI to summarize them.
- Provide a JSON file with structured data for the AI to analyze.
Conversation History
Use the number toggle to adjust the length of conversation history storage:
- If set to 0, all previous conversation history will be cleared for additional quick searches.
- Higher values allow the AI to reference more past interactions, improving contextual understanding for ongoing tasks.
Enable Premium Web Searches
To use live web data in your custom prompts, click the Enable Web Search button. Make sure to enter your prompt details before enabling web searches. These searches may take a few minutes to process, but they will return detailed outputs directly to your custom prompts. This feature is especially useful for queries that require real-time information, such as:
- Dates of sporting events
- Weather predictions
- Breaking news
Important Notes:
- Custom prompts provide flexibility to tailor AI outputs to specific tasks.
- Live web search results depend on the availability of real-time data and may vary in response time.
- Desktop MultiPrompter is required for certain advanced features, such as Google Gemini Pro.
- File inputs and keyword replacement allow for further customization and scalability of outputs.
The My Custom AI Prompts section is a versatile tool for creating highly customized outputs, empowering you to leverage AI capabilities for a wide range of applications, from live searches to complex data processing.
4.3 MY ARTICLE PROMPTS
The My Article Prompts section provides optional prompts that enable users to write 1-4 articles for each keyword. These articles can either be keyword-specific or general. You can bypass article prompts entirely by not selecting them from the options menu.
Article Modes
Note that you can only select one article mode at a time and must disable the current mode before selecting another. Use any of the following optional settings to provide additional details and customize your articles:
Article Style
Enter instructions for the preferred styling of your articles. This includes formatting, text layout, and paragraph structure.
For example: "Write articles in Markdown format and include charts and bullet points to break down complex sections."
Article Topic
Specify the topic and focus of your articles. Topics can range from broad to highly specific depending on your needs.
For example: "Highlight the evolution of renewable energy technologies from 2000 to 2020."
Article Audience
Provide details about the target audience for your articles. This helps the AI tailor the tone and style to your readers.
For example: "My audience consists of young professionals interested in personal finance."
Article Product
Include information about products you want featured in your articles. Add detailed descriptions to ensure accurate representation.
For example: "This article should advertise our new AI-powered software, focusing on its efficiency and user-friendly interface."
Article Branding
Add branding information, including your company name, website, or specific landing pages to reference in the articles.
For example: "My company is Aimultiprompter.com, and we specialize in AI-driven solutions for businesses."
Article SEO
Provide instructions for generating SEO-friendly snippets and URLs optimized for your keywords.
For example: "Create a 70-90 word meta description optimized for 'AI marketing tools' and generate a custom URL like 'aimultiprompter.com/ai-marketing-tools'. Place these at the end of my article."
Article Customer Bases
Describe your intended customer base or market segments to guide the AI in tailoring content.
For example: "Target these customer bases: tech enthusiasts, small business owners, and students."
Article Visual Elements
Add instructions for embedding visual elements like images, videos, or diagrams. This can include placeholders or links to specific media.
For example: "Include a placeholder for an image URL in Section 3 and a link to a product demo video in Section 5."
Article Modes:
- Enable Single Article Mode: Use this mode to write one article only.
-
Enable Multiple Article Mode: Write up to 3 unique articles using:
- My Custom Article 1
- My Custom Article 2
- My Custom Article 3
- Enable Combination Article Mode: Combine the first three articles into a 4th master article. This mode synthesizes the content of the original articles but uses more tokens as it processes the full inputs of all three.
- Enable Link Article Mode: Create a 4th article that uses the first three articles as subsections (1, 2, and 3). This mode works best when you provide instructions for the linked article, detailing what the AI should write for each subsection.
The My Article Prompts section allows you to customize your content creation process with tailored instructions, enabling detailed, audience-specific, and SEO-optimized articles. Whether creating a single article, multiple articles, or master articles, this feature provides the flexibility and tools to meet diverse needs.
4.4 MY IMAGE PROMPTS
The My Image Prompts section enables both text-to-image and image-to-text processing, providing powerful tools for creating or analyzing images. Whether you want to generate stunning visuals or gain insights from uploaded images, this section offers comprehensive options to meet your needs.
My Image Uploads
Use the following upload slots to ask questions or perform tasks related to the images you provide:
- My Image Upload 1
- My Image Upload 2
- My Image Upload 3
- My Image Upload 4
Upload your images, then use Chat-GPT-4 to ask questions about one or multiple images simultaneously. This is ideal for tasks such as:
- Analyzing image content
- Extracting text from images
- Generating descriptions or summaries of the images
For example: "What is the primary object in Image 1, and how does it relate to Image 3?"
Image Generation
Use slots Image 1 through Image 10 to create keyword-specific or non-keyword-specific images with detailed instructions. These prompts work with AI models DALL-E 2 or DALL-E 3 to produce highly customized visuals. Examples of custom directions include:
- "Generate a fantasy landscape with a castle on a mountain under a starry sky."
- "Create an image of a futuristic city with flying cars and neon lights."
Image Size Selection
Select the size for all images generated with DALL-E 3:
- 1024x1024
- 1024x1792 (portrait orientation)
- 1792x1024 (landscape orientation)
Note that all DALL-E 2 images are fixed at 1024x1024 resolution.
Image Model Selection
Choose the AI model to generate your images:
- DALL-E 2: Costs 400 tokens per image.
- DALL-E 3: Costs 800 tokens for a standard 1024x1024 image.
DALL-E 3 Image Quality
Control the quality of DALL-E 3 images:
- Standard: Default quality, using fewer tokens.
- HD: High-definition quality for sharper and more detailed images, using more tokens.
DALL-E 2 Image Numbers
For DALL-E 2, you can generate up to 10 images per response. Each additional image increases the cost by 400 tokens. For example:
- 1 image = 400 tokens
- 5 images = 2,000 tokens
- 10 images = 4,000 tokens
Important Notes:
- Ensure your instructions are detailed and specific to achieve the desired output.
- Combining high image quality with multiple outputs may increase token usage significantly.
- Image-to-text processing is limited to uploaded images in My Image Uploads.
- DALL-E 3 offers higher quality outputs compared to DALL-E 2, but at a higher token cost.
The My Image Prompts section is a versatile tool for creating and analyzing images, empowering users to generate custom visuals or extract meaningful insights from their own uploads. Whether crafting visuals for creative projects or conducting in-depth analysis, this section provides the flexibility and features you need.
4.5 MY SEARCH RESULT PROMPTS
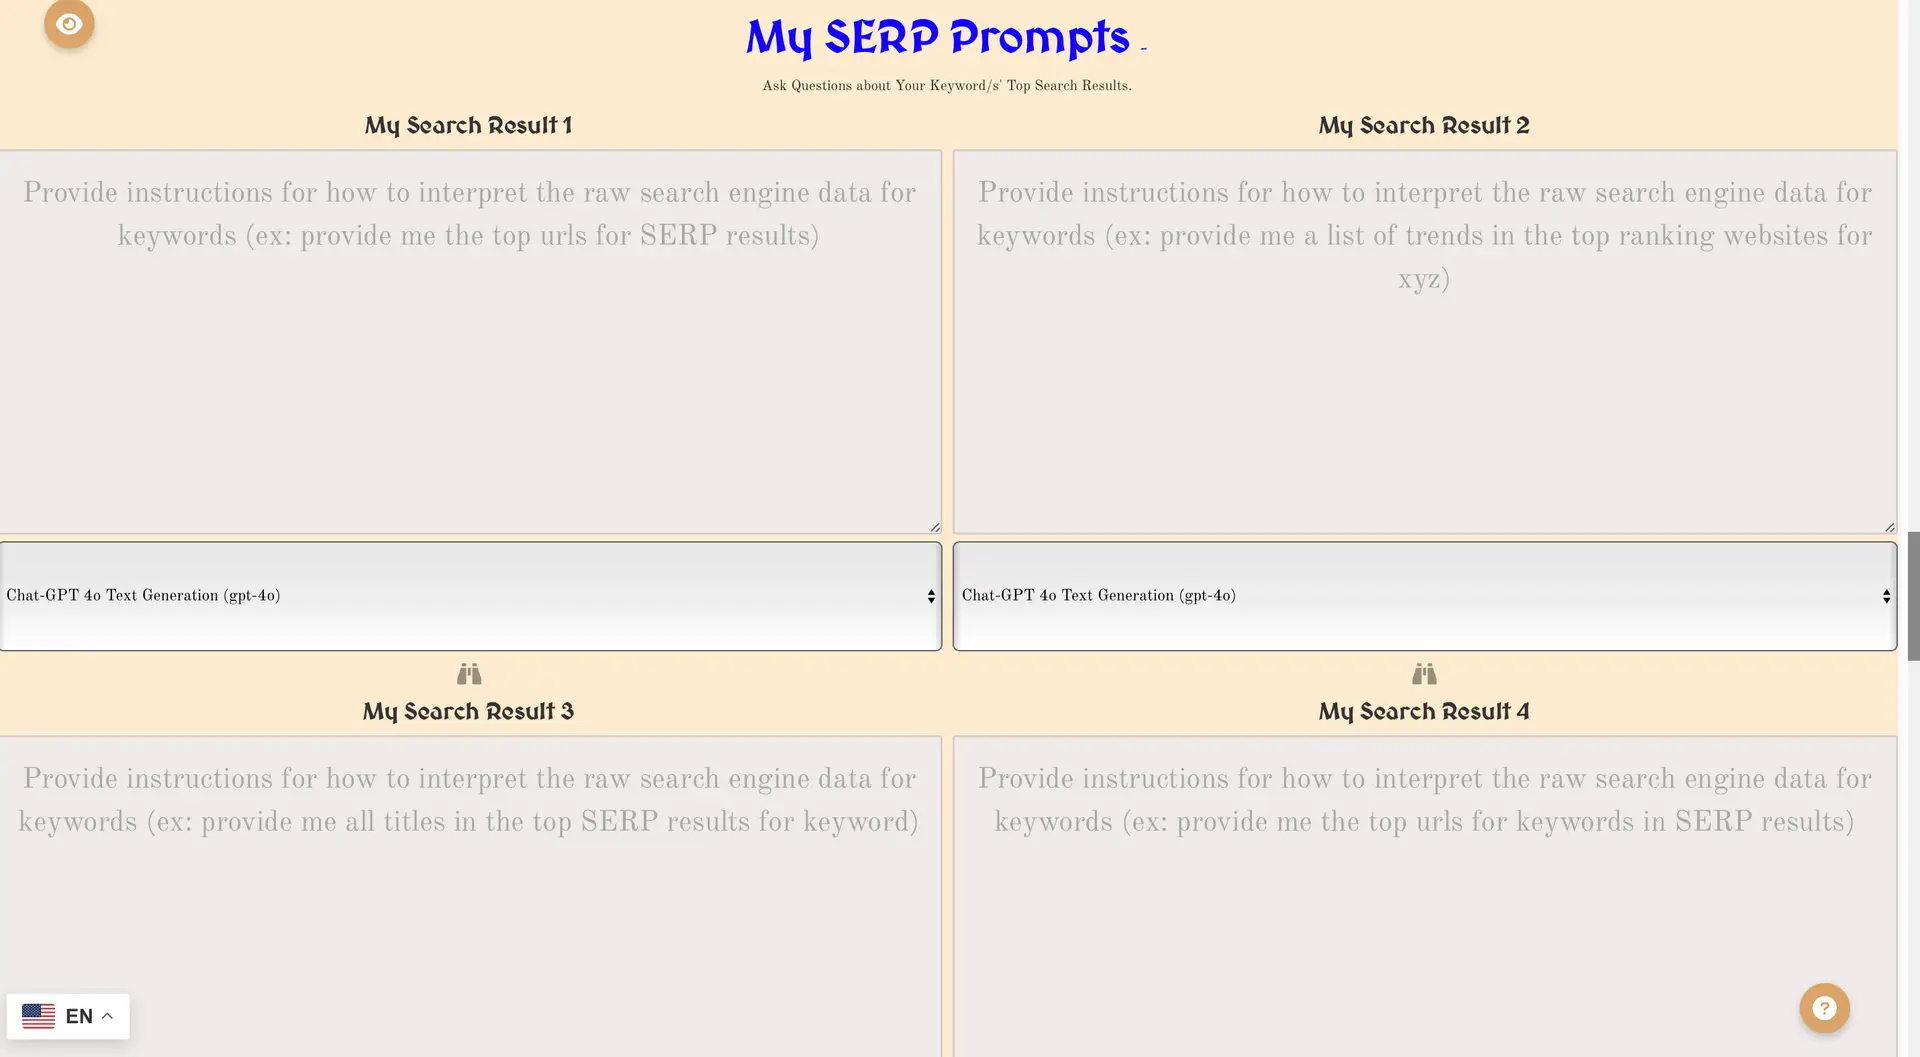
The My SERP Prompts section allows you to ask detailed questions based on Google Search Results and retrieve comprehensive SERP (Search Engine Results Page) data for your specified keywords. This feature utilizes replacement logic to extract specific components of the search results, ensuring accurate and detailed responses for your queries.
Important Notes:
To use SERP prompts effectively:
- You must include keywords in your query as keyword-less options are not supported.
- Each keyword will return detailed search result data based on the replacement logic codes described below.
How SERP Replacement Logic Works:
When performing a SERP prompt, each data element in the Google Search Results is extracted and replaced with the corresponding replacement logic code. Below is a natural language explanation of the replacement codes:
- Complete Search Data: Represents all available Google Search Result data for the specified keywords.
- Google URLs: Extracts the link to each search result, replaced as "Link."
- Google Titles: The title of each search result, replaced as "Title."
- Google Queries: Includes the query details used in the search, replaced as "Queries."
- Google Context: Provides additional context about the search, replaced as "Context."
- Google Search Info: Returns metadata about the search, replaced as "SearchInformation."
- Google Kind: Indicates the type of search result, replaced as "Kind."
- Google HTML Title: The HTML version of the search result title, replaced as "HtmlTitle."
- Google Display Link: The display link of the search result, replaced as "DisplayLink."
- Google Snippet: A snippet or summary of the search result, replaced as "Snippet."
- Google HTML Snippet: The HTML-formatted version of the snippet, replaced as "HtmlSnippet."
- Google Cache ID: The cache ID of the search result, replaced as "CacheId."
- Google Formatted URL: The formatted URL of the search result, replaced as "FormattedUrl."
- Google HTML Formatted URL: The HTML-formatted version of the URL, replaced as "HtmlFormattedUrl."
- Google Pagemap: Provides additional structured data from the search result, replaced as "Pagemap."
- Google Thumbnail: Extracts the thumbnail image associated with a result, replaced as "Cse_thumbnail."
- Google Image: Extracts any associated image, replaced as "Image."
- Google Open Graph Image: Extracts the Open Graph image metadata, replaced as "Og:Image."
- Google Search Time: The time taken for the search, replaced as "SearchInformation.searchTime."
- Google Total Results: The total number of search results, replaced as "SearchInformation.totalResults."
- Google Search Terms: The terms used in the search query, replaced as "Queries.request[0].SearchTerms."
- Google Pagination: Includes pagination details such as next page index and total results for subsequent pages, replaced with codes like "Queries.nextPage[0].StartIndex."
- Google Metadata: Metadata such as input/output encoding, safe search settings, and custom search engine details, replaced with specific codes such as "Queries.request[0].Cx" or "Queries.nextPage[0].Cx."
Example SERP Prompt Usage:
If your keyword is "AI marketing tools" and you want to retrieve details like links, titles, and snippets, you can structure your prompt as follows:
- "Provide the Google Titles, Google Snippets, and Google URLs for my keywords."
- Title: "Top AI Marketing Tools in 2024"
- Snippet: "Discover the latest AI tools to streamline your marketing strategy."
- Link: https://example.com/ai-marketing-tools
Customizing Your SERP Prompts:
You can customize your SERP prompts to extract specific details or perform advanced searches. For example:
- Include pagination details by asking for "NextPageStartIndex" (retrieved using Google NextPageStartIndex = "Queries.nextPage[0].StartIndex") or "TotalResults" (retrieved using Google TotalResults = "Queries.request[0].TotalResults").
- Retrieve structured data like "Pagemap" (retrieved using Google Pagemap = "Pagemap") for additional information about search results.
- Extract images and Open Graph metadata for visual elements by referencing "Cse_thumbnail" (retrieved using Google Cse_thumbnail = "Cse_thumbnail") or "Og:Image" (retrieved using Google Og:Image = "Og:Image").
Important Notes:
- SERP prompts are highly detailed and require the use of keywords for proper functionality.
- Using multiple replacement codes in a single prompt may increase processing time and token usage.
- The AI provides structured, keyword-specific results based on Google Search API data.
The My SERP Prompts section is a powerful tool for extracting and analyzing Google Search Results, making it ideal for research, SEO, and generating keyword-specific insights.
sERP replacement logic:
complete search data|complete google search results| complete search results= complete keyword sERP Data
google urls, google link= "link"
google titles= "title"
google queries= "queries"
google context= "context"
google search info= "searchInformation"
google kind= "kind"
google htmlTitle= "htmlTitle"
google displayLink="displayLink"
google snippet= "snippet"
google htmlSnippet= "htmlSnippet"
google cacheId= "cacheId"
google formattedUrl="formattedUrl"
google htmlFormattedUrl="htmlFormattedUrl"
google pagemap="pagemap"
google cse_thumbnail= "cse_thumbnail"
google src="src"
google width="width"
google height="height"
google metatags="metatags"
google image= "image"
google og:Image= "og:image"
google urlType="url.type"
google urlTemplate="url.template"
google requestTitle="queries.request[0].title"
google totalResults= "queries.request[0].totalResults"
google searchTerms="queries.request[0].searchTerms"
google count="queries.request[0].count"
google startIndex="queries.request[0].startIndex"
google inputEncoding= "queries.request[0].inputEncoding"
google outputEncoding= "queries.request[0].outputEncoding"
google safe= "queries.request[0].safe"
google cx= "queries.request[0].cx"
google nextPageTitle= "queries.nextPage[0].title"
google nextPageTotalResults= "queries.nextPage[0].totalResults"
google nextPageSearchTerms="queries.nextPage[0].searchTerms"
google nextPageCount="queries.nextPage[0].count"
google nextPageStartIndex="queries.nextPage[0].startIndex"
google nextPageInputEncoding= "queries.nextPage[0].inputEncoding"
google nextPageOutputEncoding= "queries.nextPage[0].outputEncoding"
google nextPageSafe= "queries.nextPage[0].safe"
google nextPageCx= "queries.nextPage[0].cx"
google contextTitle= "context.title"
google searchTime= "searchInformation.searchTime"
google formattedSearchTime= "searchInformation.formattedSearchTime"
google totalResultsCount= "searchInformation.totalResults"
google formattedTotalResults="searchInformation.formattedTotalResults"
4.6 MY AUDIO PROMPTS
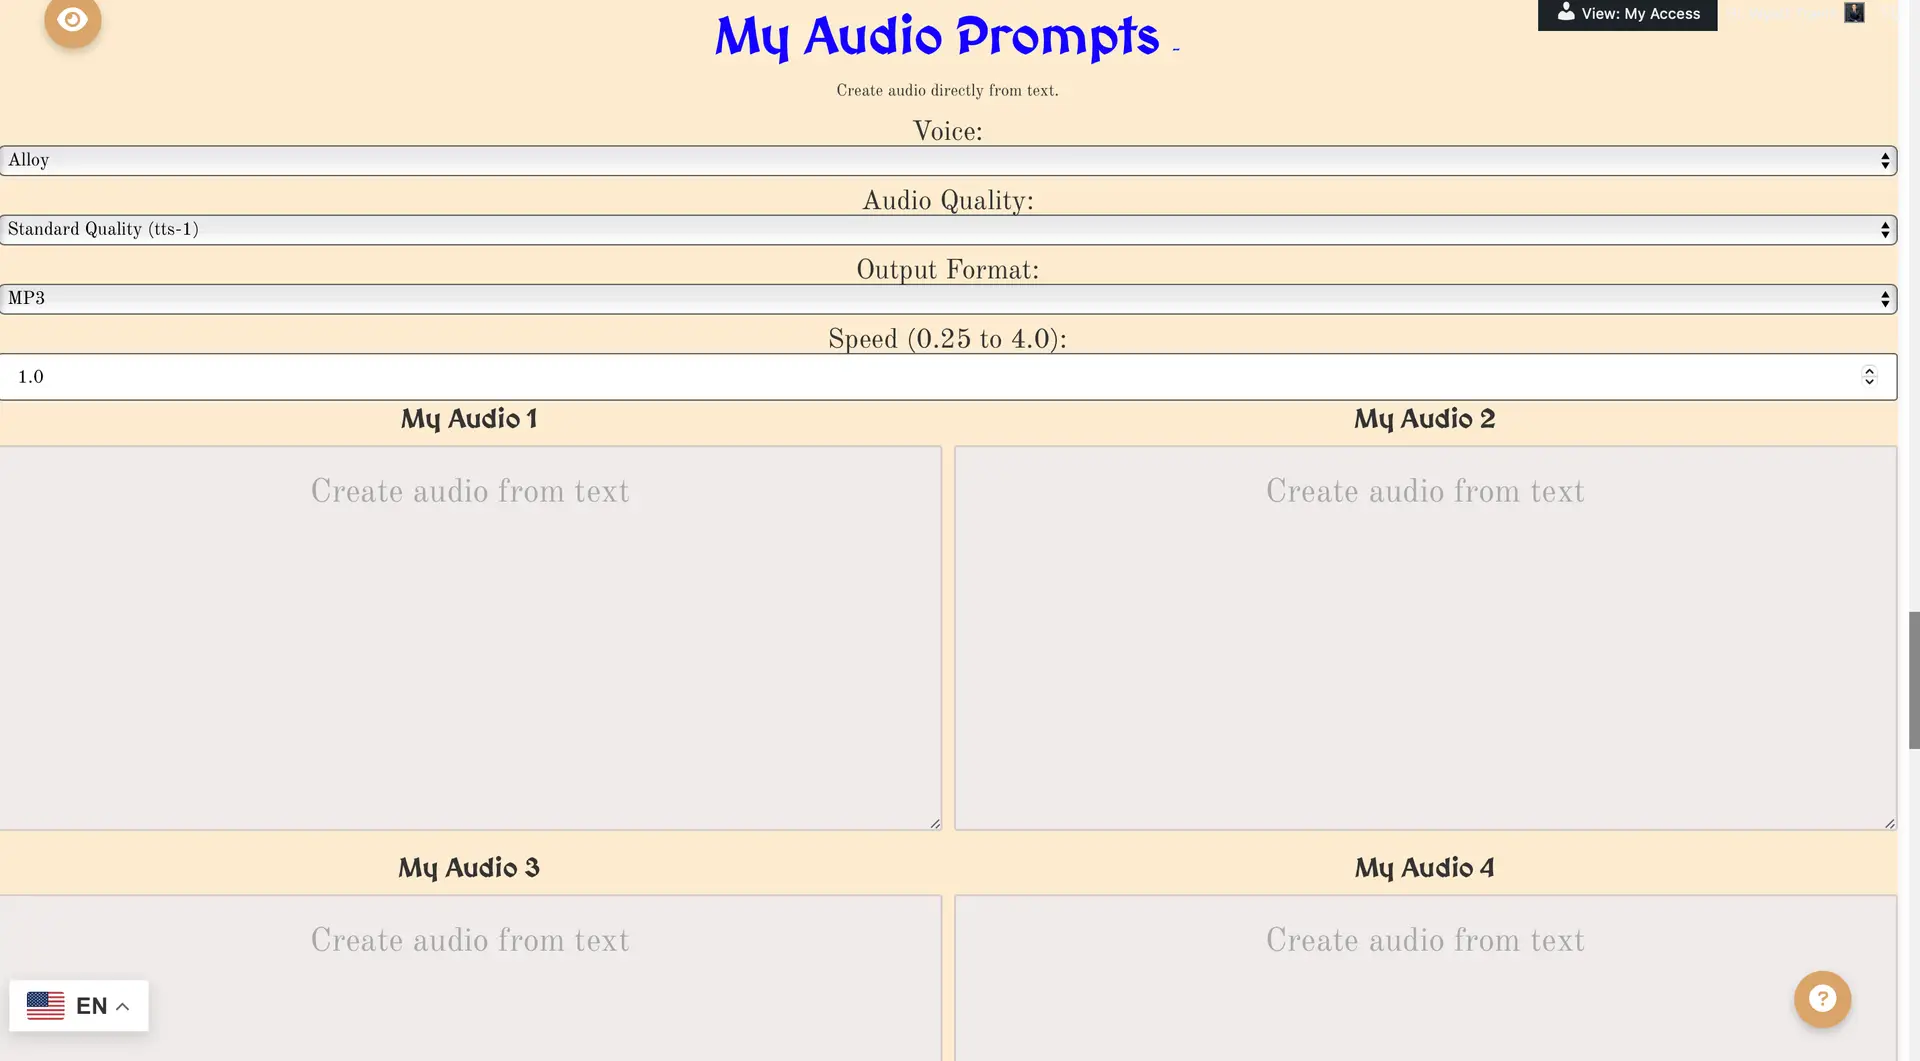
The My Audio Prompts section allows you to generate high-quality audio from text using advanced AI models. This feature includes customizable options for voice selection, audio quality, output format, and playback speed, making it perfect for creating personalized audio content such as podcasts, narrations, audiobooks, or marketing materials.
Voice Selection
Choose from 6 unique AI-generated voice options to match your desired tone and style:
- Alloy: A versatile and balanced voice suitable for general content.
- Echo: A resonant voice ideal for storytelling and dramatic narratives.
- Fable: A soft, engaging voice perfect for children’s stories or calm content.
- Onyx: A bold, authoritative voice suited for formal or professional use.
- Nova: A futuristic voice great for tech-related content or innovative themes.
- Shimmer: A light, cheerful voice ideal for upbeat or casual content.
Audio Quality
Choose between two audio quality options under the Audio Quality dropdown:
- Standard Quality (TTS-1): A faster, token-efficient option for general use.
- High Quality (TTS-1-HD): A premium option for crystal-clear audio, ideal for professional-grade projects such as audiobooks or marketing campaigns.
Output Format
Select your preferred audio file format under the Output Format dropdown:
- MP3: A widely supported format for most devices, offering a balance of quality and file size.
- Opus: A high-compression format ideal for streaming or online use.
- AAC: A high-quality format often used in Apple devices and streaming services.
- FLAC: A lossless format for the highest audio fidelity, suitable for archival purposes or audiophile-quality projects.
Playback Speed
Adjust the playback speed of the generated audio using the Speed slider, ranging from 0.25x to 4.0x:
- Use slower speeds (e.g., 0.5x) for calm, deliberate narration or detailed explanations.
- Use faster speeds (e.g., 2.0x) for energetic presentations or quick overviews.
How to Use Audio Prompts:
1. Enter the text you want to convert to audio in the prompt field.
2. Select a voice from the Voice dropdown to match your desired tone and style.
3. Choose the audio quality that best suits your project requirements.
4. Pick an output format compatible with your intended use case.
5. Adjust the playback speed using the slider to control the pacing of the generated audio.
6. Submit your prompt to generate the audio file, which can then be downloaded and used as needed.
5.1 START SEARCH
The Start Search section allows you to initiate and control the MultiPrompter’s search operations. This dynamic interface lets you enable or disable specific search modes, estimate token costs, track search progress, and manage your results efficiently. It is designed for seamless and flexible use, adapting to various search types while keeping token usage in check.
Enable/Disable Search Modes
Activate or deactivate the specific search modes you want to use. Each search mode consumes tokens, and enabling multiple modes simultaneously increases the token cost. Available modes include:
- Keyword Google Data: Retrieve Google Search Results and associated keyword data.
- Related Keywords: Identify related keywords for deeper content optimization and research.
- YouTube Scraping: Fetch video data, including titles, descriptions, and metadata.
- Custom Prompts: Execute tailored prompts for specific tasks or projects.
- Image Prompts: Generate or analyze images using advanced AI models.
- SERP Prompts: Perform detailed SERP (Search Engine Results Page) analysis.
- Audio Prompts: Convert text to high-quality audio with multiple customization options.
Max Token Input Cost
Set a limit on the maximum number of tokens that can be used for each ChatGPT response. This ensures that your searches stay within your budget and prevent unintended overuse of resources. Adjust the slider or enter a specific value to customize the token cap according to your needs.
Search Cost Estimator
The Search Cost Estimator provides real-time calculations of token usage based on your selected search modes and current settings. It breaks down token costs for each category, including:
- Keywords: Tokens used for keyword searches.
- Image Uploads: Tokens consumed for analyzing uploaded images.
- Custom Prompts: Tokens used for specific user-defined prompts.
- Article Prompts: Tokens allocated for generating articles.
- Image Prompts: Tokens used for creating or analyzing images.
- Web Search: Tokens consumed for live web searches.
- Audio Tokens: Tokens allocated for generating audio content.
Search Progress
Monitor the progress of your searches in real-time with the progress bar. Key metrics displayed include:
- Search Progress: Shows the percentage of the current search completed.
- Currently Generating: Displays the specific task or item being generated (e.g., keyword data, image prompt).
Results Table
The results table organizes the generated outputs for easy review. Categories include:
- Keyword: Lists the searched keywords or terms.
- YouTube: Displays video-related data from YouTube Scraping mode.
Export Options
Export your search results for further use or analysis. Available options include:
- Download CSV: Download the results table as a CSV file.
- Copy CSV: Copy the results table directly to your clipboard for quick sharing.
- All to Audio: Convert all results into audio files for easy consumption.
Start and Stop Buttons
Use the Start button to begin the search process. To halt an ongoing search, click the Stop button. These controls provide flexibility and allow you to manage searches based on real-time requirements.
The Start Search section is a comprehensive and intuitive interface for initiating, managing, and optimizing your searches. It combines robust functionality with user-friendly controls, ensuring that you get the most out of your MultiPrompter.
5.2 ADDITIONAL SEARCH SETTINGS
Select the Correct Additional Search Settings
To initiate the desired type of search, select the appropriate additional search settings. Each option enables specific functionality, tailored to your search requirements. Below are the detailed descriptions of each setting:
Enable Related Keywords
This option enables a fetch using Chat-GPT-4 to return a list of additional keywords similar to those you provide. It is a powerful feature for keyword generation, helping to expand your keyword set for SEO, content planning, or research.
For example: If your keyword is "AI marketing," the tool might generate related terms like "machine learning marketing," "AI advertising tools," and "predictive analytics for marketing."
Enable My Custom Prompts
Activating this option allows you to use custom prompts for highly specific queries. A fetch will be generated for each custom prompt with instructions tailored to each keyword. This setting is ideal for tasks that require detailed and personalized responses.
For example: A custom prompt could instruct the AI to generate a detailed blog post outline, an image description, or a specific dataset analysis based on your keywords.
Enable My Image Prompts
Enabling this setting activates the 14 image prompts, including:
- 4 Image-to-Text prompts: Analyze uploaded images and extract meaningful information, descriptions, or context.
- 10 Text-to-Image prompts: Generate images based on your keyword or custom input using advanced AI models like DALL-E 2 or DALL-E 3.
Enable My SERP Prompts
This option enables search engine prompts that fetch keyword-specific Google Search Result data. The tool extracts structured SERP data using replacement logic, allowing for advanced research and analysis. It is highly useful for SEO, competitor analysis, or understanding search intent.
For example: Fetch Google Titles, Snippets, and Links for "AI tools for marketing," providing detailed insights into the top search results.
Enable My Audio Prompts
Activating this setting enables the 4 audio prompts, allowing you to generate audio content from text. Use this feature to create high-quality narrations, podcasts, audiobooks, or promotional audio materials.
For example: Use audio prompts to generate an MP3 narration of a blog post or create an audio version of product descriptions for accessibility purposes.
Important Notes:
- Each enabled setting increases token usage. Ensure your Max Token Input Cost is adjusted to accommodate the selected features.
- Combining multiple settings can significantly enhance the depth and variety of results, but may require longer processing times.
- Customize your inputs for each enabled setting to maximize output relevance and quality.
Select the settings that align with your specific needs to start a search that delivers precise, actionable results.
5.3 SEARCH COST ESTIMATOR
Important Notes on Search Cost Estimator and Processing Bar
Search Cost Estimator:
The Search Cost Estimator is designed to provide a rough estimate of the token costs associated with your search. However, it is not always accurate due to several factors, including:
- Prompt Length: Longer prompts consume more tokens, which may exceed the estimated costs.
- Model Type: Different AI models (e.g., DALL-E 2, DALL-E 3, Chat-GPT-4) have varying token costs per operation.
- Complexity of the Task: More detailed or resource-intensive queries may result in higher token usage.
Recommendation: Test out any large or complex search with a smaller search first to ensure that the results align with your expectations. This will help you fine-tune your settings and minimize unexpected token usage.
Processing Bar Percentages:
The Processing Bar provides a visual indication of the progress of your search. However, the percentages displayed are also approximate and may not always match the actual fetching totals. Factors influencing inaccuracies include:
- Processing Time Variations: Some tasks take longer to complete, especially when dealing with larger datasets or multiple search modes.
- Asynchronous Fetching: Results may be fetched at different speeds, causing the progress bar to lag or move inconsistently.
Best Practices:
- Use the cost estimator and progress bar as general tools, not precise indicators.
- For large or complex searches, adjust your Max Token Input Cost to ensure sufficient resources are available.
- Start with smaller searches to confirm expected outputs before scaling up to larger ones.
- If results are delayed, avoid restarting the search prematurely. Simply wait for the app to process the remaining results.
By keeping these considerations in mind, you can optimize your searches while ensuring accurate and timely results. Treat these tools as helpful guides, but always verify and adjust based on your specific requirements.
5.4 RESULT TABLE
The Result Table serves as a central database for displaying all -My AI MultiPrompter results generated from MultiPrompter. This feature consolidates your outputs in one place, making it easy to manage and review your results efficiently.
Navigation:
Use the scroll down and scroll left/right options to navigate through the tabs and rows of the result table. This ensures seamless access to all generated results, regardless of the search type or scope.
Cell Modal Screen:
Click on any cell to open a modal screen where you can directly edit the content. This feature is especially useful for:
- Reformatting AI responses to match specific requirements.
- Fixing minor errors or inaccuracies in the output.
- Making quick adjustments without needing to re-run a search.
Audio and Image Links:
Audio and image links displayed in the result table are temporary and expire after 1 hour. To ensure you don’t lose access:
- Click on the links within 1 hour of their generation.
- Right-click on audio and image links to download them immediately for future use.
- Alternatively, use the Export CSV feature to save all links for later access.
Handling Errors:
Be aware that prompting errors, connection issues, and fetching limitations can occasionally occur. These errors are more common under the following conditions:
- Image Creation: Using too many keywords or generating multiple images simultaneously may result in timeouts or errors.
- Audio and Text: Audio and text prompts are less constrained by time and can process larger volumes without significant issues.
Recommendation: If you encounter errors, reduce the number of keywords or prompts to improve processing stability. For technical issues, reach out to support for assistance with prompting or fetching limitations.
Best Practices:
- Download or save audio and image links promptly to avoid losing access due to expiration.
- Edit AI-generated results directly in the result table for faster refinements.
- Export the result table as a CSV for backup or to share with collaborators.
- Plan your searches to avoid overwhelming the system with excessive keywords or simultaneous prompts.
The Result Table is a versatile and user-friendly tool for managing your MultiPrompter outputs, offering flexibility in navigation, editing, and exporting while providing safeguards for time-sensitive links.
6.1 DOWNLOAD OPTIONS AND SETTINGS
Using Additional Features for Result Management and Settings
Download CSV
Click on the Download CSV button to download a complete copy of the result table. The exported file includes:
- Links to any audio and images generated during the search.
- All text responses associated with each keyword.
- Structured data for easy analysis and sharing.
Save Default Search Settings
Use the Save Default Search Settings button to store your current search configurations in MultiPrompter. This includes all selected modes, input fields, and other search parameters. Whenever you update your search settings, press this button again to overwrite the saved defaults. This ensures that you always have a predefined starting point for future searches.
Load Last Saved Default Search Settings
Clicking the Load Last Saved Default Search Settings button will reload the settings saved in your last session. This includes all modes, inputs, and parameters previously stored using the Save Default Search Settings button. This feature allows you to quickly resume work with your preferred configurations, saving time and effort when setting up new searches.
Clear All Input Fields
The Clear All Input Fields button removes all text and data from input fields across all MultiPrompter prompts. This is useful for:
- Removing unwanted text from previous searches.
- Starting fresh with new inputs without residual data from past sessions.
Best Practices:
- Download the CSV file after each search to save a record of your results, including time-sensitive links to audio and images.
- Regularly update and save your default search settings to reflect your evolving needs.
- Use the load feature to quickly revert to preferred settings and avoid manually reconfiguring options.
- Clear all input fields when preparing for a new search session to avoid conflicts with previous inputs.
These features enhance the usability and efficiency of MultiPrompter, providing seamless ways to manage results and customize your search settings for optimal performance.
7.1 MULTIPROMPTER USER ACCOUNT SETTINGS
use multiprompter member portal to access all account specific information, such as your current subscription plan, billing, or token information. You must be logged in to purchase tokens as well as to use multiprompter either on desktop or mobile versions.
8.1 MULTIPROMPTER PAYMENT AND TOKENS SETTINGS
Important Token and Membership Information
Token Requirements:
You must have at least 1 token available in your account to run any search. If you are a new user, your account will automatically be credited with 20,000 free tokens upon signup. These initial tokens are never used and are provided in addition to any tokens included in your subscription plan. For example:
- AI MultiPrompter Basic Members: Receive 100,000 tokens per month as part of their plan, plus the 20,000 free tokens upon account creation.
- Other Subscription Plans: Receive their respective token allocation per month, plus the 20,000 signup bonus.
Token and Membership Policies:
- All token and membership sales are final.
- You may cancel your subscription at any time through the MultiPrompter Member Portal or by contacting wyatt@aimultiprompter.com.
- Cancelling your subscription will prevent future renewals but will not refund any already purchased tokens or active membership periods.
Best Practices:
- Track your token usage carefully to ensure you have enough tokens for all planned searches.
- Take advantage of the 20,000 free tokens to familiarize yourself with MultiPrompter features before purchasing additional tokens or committing to a subscription.
- Review your subscription plan to ensure it aligns with your token needs and upgrade or downgrade as necessary.
By understanding these policies and token allocations, you can optimize your MultiPrompter experience while managing your membership and resources effectively.
9.1 MULTIPROMPTER LIVE WEB (INTERNET BASIC AND PREMIUM ONLY)
Live Web Search Access and Features
Access Requirements:
Live web search is an exclusive feature available only to current Internet Basic or Internet Premium members. Ensure your subscription plan includes this feature to take advantage of real-time web data integration.
What is Live Web Search?
Live web search connects your AI MultiPrompts to live web data, enabling dynamic and real-time interactions with online content. This feature enhances the functionality of your searches by pulling data directly from the web to answer queries, provide context, and deliver up-to-date information.
Types of Live Web Searches:
There are two types of live web searches, offering flexibility for different user needs:
- Direct URL Web Searches: Ask specific questions about particular websites by directly entering their URLs, separated by commas, into the input field. Once entered, click the Enable Web Search button to fetch results. For example:
- URLs: https://example.com, https://anotherexample.com
- Query: "What products are listed on these websites?"
- Prompt-Based Live Web Searches: Enter a natural language prompt and click the Enable Web Search button to fetch real-time web data relevant to your query. For example:
- Prompt: "What are the latest AI tools available for marketing?"
Where You Can Use Live Web Search:
Live web search is integrated into the following MultiPrompter features:
- My AI Quick Search: Perform quick real-time searches for immediate results.
- My Custom Prompts: Combine live web data with your personalized prompts for tailored outputs.
- Search Engine Prompts: Retrieve and analyze search engine result data enriched with live web inputs.
Best Practices:
- Ensure your subscription plan supports live web search to avoid access issues.
- For direct URL searches, double-check that the URLs are correctly formatted and active.
- When using prompt-based searches, provide clear and concise prompts to optimize the relevance of your results.
- Use live web search for time-sensitive queries, such as current events, market trends, or breaking news.
Important Notes:
- Live web searches rely on active internet access and may take slightly longer than standard AI prompts due to the need for real-time data fetching.
- Ensure you are logged into your MultiPrompter account with an active Internet Basic or Internet Premium subscription to enable live web search functionality.
The Live Web Search feature significantly enhances the power and versatility of MultiPrompter, allowing you to connect AI prompts with live, up-to-date web data for more accurate and relevant results.
10.1 My CONNECT AI
My Connect Mode – Sequential AI Model Processing
What is Connect Mode?
My Connect Mode in AI MultiPrompter is an advanced feature that allows for sequential AI model processing. This means multiple AI models can work together in a step-by-step process, where the output from one step becomes the input for the next. It enables you to create sophisticated workflows, adapting each step to specific tasks while maintaining continuity and relevance across all steps.
How Does Connect Mode Work?
Connect Mode leverages over 20 AI models to process tasks in a sequential and interconnected manner. Here’s how it works:
- Each step begins after the previous step is completed.
- The output of one step is seamlessly passed to the next step, ensuring all steps relate to and build upon one another.
- You can customize each step in the sequence to perform specific tasks, adapting the workflow to your unique needs.
Key Features of Connect Mode:
- Sequential Processing: Automate complex workflows by chaining tasks in logical sequences.
- Multi-Model Integration: Utilize different AI models for various tasks, such as text generation, image creation, audio synthesis, or data analysis.
- Interconnected Outputs: Ensure that every step in the sequence is contextually aware of the outputs from prior steps, enhancing relevance and accuracy.
Example Workflow in Connect Mode:
Let’s say you want to create a content marketing strategy using Connect Mode. Here’s an example of how sequential AI model processing might work:
- Step 1: Use an AI model to generate a list of trending keywords in your industry.
- Step 2: Pass the keywords to another AI model to generate blog topic ideas based on those keywords.
- Step 3: Use a text-to-image model to create featured images for the blog topics generated in Step 2.
- Step 4: Use an audio model to generate a podcast script summarizing the blog content.
Benefits of Connect Mode:
- Streamlined Workflows: Automate and simplify multi-step processes, saving time and effort.
- Enhanced Contextual Relevance: Each step is informed by the previous ones, ensuring continuity and accuracy.
- Customization: Tailor the sequence to meet specific project requirements, leveraging the strengths of multiple AI models.
- Scalability: Handle complex, multi-faceted tasks that would be difficult or time-consuming to perform manually.
Key Considerations:
- Plan your steps carefully to ensure a logical and effective sequence.
- Monitor token usage as multi-step processes can consume more resources.
- Test smaller workflows before scaling to larger, more complex tasks to ensure optimal results.
Conclusion:
My Connect Mode is a powerful tool for leveraging the full capabilities of AI MultiPrompter. By enabling sequential AI model processing, it allows you to tackle complex tasks with precision and efficiency. Whether you’re creating content, analyzing data, or generating multimedia outputs, Connect Mode provides the flexibility and scalability to streamline your workflows and achieve your goals.
Sign Up for AI MultiPrompter Membership
Access 11+ Premium AI Models Connected to Over 7000+ Apps and Live Internet and Keyword Search Options
View OptionsLogin to Existing AI MultiPrompter Account
Login to Start the MultiPrompter App, Change or Cancel your Membership, and more
Login Here